Rick & Morty S03E03 Susan Sarandon’s Monologue

Dr. Wong (Susan Sarandon) gave this bit of advice to Pickle Rick on season 3, episode 3:

“Rick, the only connection between your unquestionable intelligence and the sickness destroying your family is that everyone in your family-you included-use intelligence to justify sickness.

You seem to alternate between viewing your own mind as an unstoppable force and as an inescapable curse and I think it’s because the only truly unapproachable concept for you is that it’s your mind within your control.

You chose to come here.

You chose to talk, to belittle my vocation just as you choose to become a pickle.

You are the Master of your universe and yet, you are dripping with rat blood and feces, your enormous mind literally vegetating by your own hand.

I have no doubt that you would be bored senseless by therapy the same way I am bored when I brush my teeth and wipe my ass. Because the thing about repairing, maintaining and cleaning is it’s not an adventure. There’s no way to do it so wrong you might die. It’s just work.

And the bottom line is some people are ok going to work and some people… Well, some people would rather die. Each of us gets to choose.”

July 12 2017 Windows Update Killed Firefox. How I got FF to work.

I woke up to an update from Windows on July 12th, 2017. It happened in the background while working and it restarted by itself. I usually let these happen, so no big deal. When it restarted, I was in an endless loop of firefox crashing. Uninstalled, reinstalled, lost all bookmarks, etc. Very frustrated.

I was only able to get firefox working by going back 2 major versions (52). Here’s how:

  1. Went to FF older versions page: https://support.mozilla.org/en-US/kb/install-older-version-of-firefox
  2. Chose the older versions directory: https://ftp.mozilla.org/pub/firefox/releases/
  3. Went to 52 directory: https://ftp.mozilla.org/pub/firefox/releases/52.0.2/
  4. Then choose the OS (Win64 in my case) and then your language. Then downloaded exe.
  5. Uninstalled FF
  6. Installed downloaded 52 version
  7. UNCHECKED install maintenance part (so it wouldn’t auto upgrade the browser)
  8. Crashed on startup and asked about going into safe mode. Chose safe mode. (This actually crashed in newer versions as well.) This time, it stayed open.
  9. Closed safe mode.
  10. Opened browser as usual. Worked!
  11. Did some browsing to check, then wrote this article.
  12. Tested updating to newest FF (update history showed it had been updated, but the version was 52.)
  13. Press the ALT key to show menu at the top of the screen. HELP | ABOUT FIREFOX
  14. Click the update button. Finished. Asked to restart FF. Restarted and still works.
  15. Back to FF 54

SOLVED Macrium Reflect FREE larger hard drive to smaller! (With ONLY Macrium Reflect Free)

I was upgrading my computer to a SSD drive that had a smaller capacity than my current one, and I thought it was going to be an easy process. Once I had the new SSD drive in place, I started Macrium Reflect FREE and then got a message stating that there was not enough space on the new disc. Searching the net, I found people suggesting that the Pro version had the capabilities, but I didn’t want to chance the purchase without knowing that this would work. Luckily, I found a way with the free version.

Ok, so here is how I managed to do it. I am not responsible for anything you do. This is just relaying my experience.

I cleared the recycle bin, got rid of all unneeded downloads, cleared all the browser caches, etc., to make the old disc as clear as possible.

I had purchased an external SATA hard drive box a while back. It uses 2 usb slots to power and read the drive.

Windows explorer would not immediately recognize the drive (Win 10, 64bit). I had to go into disk management to get it to show the disc. When I opened disc manager, it recognized that there was a disc that wasn’t initialized attached and it asked me if I wanted to initialize it. I said yes, and it automatically did whatever it needed to do. I then formatted the drive (it was used). The non-quick version of formatting a 240GB drive took hours!

After the format, windows showed the drive and it had two partitions on it.

I opened Macrium Reflect Free and it showed both drives. The original drive was at the top (C:). When I clicked “Clone this disc” (the one underneath the C: drive, not the new drive), I was presented with a box that showed the c: drive contents at the top and a box to choose where to clone it to. I chose the new drive, clicked on each of the partitions, hit delete partition for each one, and then tried. It stated that there was not enough space and nothing was done.

Here’s how I got it to work:

After you choose the new drive that you want to clone it to, and delete those partitions, Drag EACH OF THE PARTITIONS, ONE AT A TIME, to the new drive. But here’s the catch: drag all of the small partitions first, THEN MAKE SURE THE BIG PARTITION IS AT THE END!

As soon as I tried, I got the schedule screen, which meant that it was going to go through.

So, the trick is to put the biggest partition at the end, and make sure you have intelligent copy enabled, make sure the math is right and you don’t have more data than the new hard drive can hold-factor in the hidden partitions!

If the biggest partition is in the middle, Macrium Reflect Free wants to make enough space before adding the next partition.

If you were helped by this, let me know!

ZC01 / Z01 – Smartwatch Android 5.1 – Custom Watch Faces With WatchSquare

Below are the notes on the ZC01 / Z01 smartwatch that I found while using it (start of a manual?). I wanted to change the watch face to something more personalized, but couldn’t find anything in the play store that suited what I needed. So, I wrote an app.

I call it WatchSquare. Since I just wrote this for my own needs, I figured that if I get some sales, I could enhance the watch with more features and make it available for other models. I haven’t tested it with any other devices.

https://play.google.com/store/apps/details?id=com.xackphobe.watchsquare2

Try it out and let me know if it works on yours!

Notes on the ZC01 Android 5.1 smartwatch:

If you go into recovery mode, the screen will be blank.

If you accidentally go into bootloader mode, it will be in all chinese. I found that the last option (scroll down with back key and select with power button) is to reboot back to normal mode.
The first option looked like it went through hardware testing that took forever.

I wanted to root the watch:
Kingoroot – OEM unlock bootloader (then reboot), unlock again each time you try to root | takes 20+ tries superuser finally shows up when done.

bootloader brings up fastboot mode (fastboot devices | fastboot reboot)

3D 360 VR Video – Finally Made One! Warning!

I finally got youtube to show my file in 360 3D!

I got 2 360 cams, a selfie stick with space for 2 cameras and thought it would be an easy task to figure out how to make and upload a video to youtube in not only 360, but 3D as well. Wrong!

Since the technology is so new, there are not a lot of posts that explain how to make these videos. After 2 days of trial and error, I finally watched my video in 3D with my VRBox2, streaming from youtube in high definition (sort of).

Here is my first attempt at a 360 3D video walking to the ocean at Delray Beach, FL. (WARNING – It will probably give you a headache! Jittery, can see the cameras, etc.) To watch in cardboard or a VR app, click here.

VR Box 2.0 and Nexus 6

Just got a VR Box 2.0 with Bluetooth controller and wanted to give my tips on using this with a Nexus 6 phone. Even with the pads, I could not get my phone inside, so I started ripping it apart. The final method is to take out the springload system in the black removable phone cradle. There are tiny screws holding the springload. Just remove those and the sliding piece and voilĂ ! The phone sits just fine inside! Remember to put the pads around the area that the volume and power buttons sit.

Here is a qr code that someone posted, since it didn’t come with one. Open it with another PC or phone or print it out and use Google cardboard to switch viewer.

qr_viewer_profile-take-2

Carvana.com Truly the best car buying experience I have had.

If you have ever traded or even bought a car at any brick-and-mortar dealership, you know how rushed and icky it feels. You always feel like you got duped. Luckily, there is now an option for the computer generation!

I had been researching buying a used car for two months, due to a circumstance that required a wait. During that time, I was driving to used car dealerships and found that either the car advertised on the internet was not there or there were all sorts of add-on charges. Places that advertise “no dealer fee” found other ways to make up for that “loss”.

I wanted a specific car. I wanted a specific interior and exterior colors, so I watched the cars come and go. Towards the end of my wait period, I could not find the specific car with the mileage and price that I wanted. I was getting worried.

Insert clouds parting and rays of light.

Carvana.com

I stumbled across a listing for what I was searching for, with a slightly different interior. I read through the site in detail and it sounded too good to be true. But, I figured that I would try it out, anyway.

Here are the items that appealed to me:

The whole process is done online.

They deliver the vehicle to your home.

7 day test drive (under 400 miles).

Money back guarantee.

Those gave me enough confidence to start the buying process. I put the car in the shopping cart (they call it a garage) and started the car buying experience of a lifetime.

The first thing in the checkout was their add-ons and extended warranty. I believe in warranties because I have had to use them before. The car I was purchasing was a hybrid, so I don’t want to take a chance. Carvana.com has their own 100 day/4189 mile guarantee as well, so with all that, plus the 8-year warranty on the battery that came with the car, I feel very protected. I have had issues with buying used cars in the past and don’t want a repeat. I actually called Carvana.com when I got to the financing screen and they informed me that they do a 120 point inspection before listing the car, and the same inspection right before they ship it.

As previously mentioned, I had questions when I got to the financing page, so I called them. This was a Saturday morning and the person who answered was not only pleasant, but very knowledgeable and receptive to my barrage of questions. I wanted to know whether clicking “next” on this page was “final”, meaning “is this locking me into this?” She said no. What floored me was that she said that up until I actually sign for the car when it arrives, nothing is set in stone.

Wow.

I also learned that once it arrives, I get to test drive it before signing for it. The down payment is also not taken until you sign for it. Did you know that if you wanted to pick it up, they will give you $200 towards your plane ticket? At this point, I knew I was going through with this, no matter what.

The “dashboard” screen was great to pick your own terms and payments! Loved this! I played with the dials until I was comfortable with what I saw.

Once off the phone, I clicked “next” and was taken through a few more screens of delivery options and dates/times, and then the contracts. Never have I been able to sit down and read every word of a contract at a car dealer without them tapping their fingers on the desk. I guess no one reads them, so when I try and ask questions, they are caught unaware. I read all of the contract terms and found that, in my situation, I live more than 100 miles from the nearest Carvana.com “vending machine” (yes, they call it that), and if I return the car, I may have to pay to get it there. Better $400 than thousands.

By the way, you cannot complete the process on your phone, unfortunately. This has to be done on a desktop.

Back to the contracts. You will be asked to provide a signature and your initials up front, and then click on highlighted areas to insert these signatures into the contracts. In my case, there were 9 contracts to go through. Once I completed the final one, the last page was my confirmation and I was done.

Later, I received an email (that went to my junk folder) that had a zipped file of all the documents that I signed. The woman on the phone told me that I would be called by their people to verify a few things. At the time of this writing(Sunday), I haven’t heard from them, but I didn’t expect any calls until Monday, anyway.

I ended up having to wait a week to purchase a vehicle (personal reasons), and during that time, I actually lost out on the car I was looking at. They will not hold a car for you, which makes it better for others who were looking at it, also. Everything happens for a reason, and this was no exception. I ended up getting the exact color and interior I wanted with another vehicle on the site. The re-signing of the documents were just as quick and smooth the second time around.

After the call that verified the down payment in my bank account, the date was set for delivery. I was called the morning of delivery by Stephen, who was extremely nice and answered my last minute questions. He gave me a head’s up on where they were at and how long it would take to deliver. I was able to text with him during their commute.
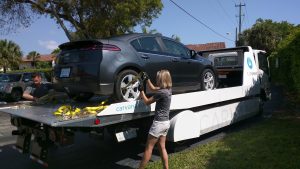
carvana.com-delivering-vehicle-xackphobe

Anita and Stephen waved as they arrived and were so friendly, I felt like I was in another world! The car looked amazing and within a minute or two, I was test driving my new car. I signed a few documents (not anything to do with the loan/ownership – those were already signed!) and they were on their way.

I cannot thank Carvana.com enough for this unusually pleasant experience and I will be telling everyone to get their next car through Carvana.com!

 

How to make a negative / inverse / opposite/ mirror image (NIOM) mold with the XackPhobe Method

While pondering the creation of a kit car, I came across the issue of getting the car exactly mirrored on both sides. Some people suggested that you get it digitally scanned and then 3D printed. Others suggested buying something that would be malleable, make a mold, then pop it out backwards to make another mold for the negative or inverse or opposite mirrored item. (NIOM mold) (pronounced NEE-AHM)

Of course, I wanted a better way. I came up with a device that would automatically give you the negative/inverse/opposite/mirror image (NIOM) mold, but I will explain here how you can do this at home without a device. This is crafting 101.

What you need:

Please note that this will ONLY give you a rough perpendicular mold.

Depending on the intricacies, you will need either very small rods or wooden dowels, or, if you are working on something big, like a car, large ones. So, for example, we are working on making a mold of a left hand to make a right hand. I would choose wooden sticks with a diameter of 10mm/one centimeter. If you want a lot of detail, you could go even smaller.

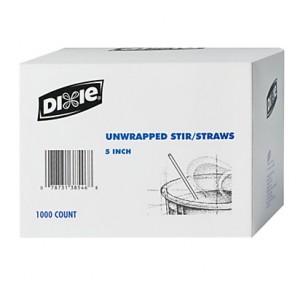
While writing this, I came up with an even cheaper solution. Coffee stirrers. Go to a restaurant supply store (GFS in FL) and pick up a few boxes. 2 boxes will equal one box, because you will want them tightly packed in the box. Use tape to reinforce the box before you shove the contents of the second box into the first. So, now that I have decided on coffee stirrers, I will use that for the rest of this.

347682_scene7

Office Depot stirrers

You will need a Dremel-type saw. Since this is to go as cheap as possible, you could use a nail file/buffer kit (Sally’s Beauty Supply $40) and a dremel-type blade. Or you could carefully cut through them with an exacto-knife or razor blade, but this would take a long time.

Put your item on a flat surface.

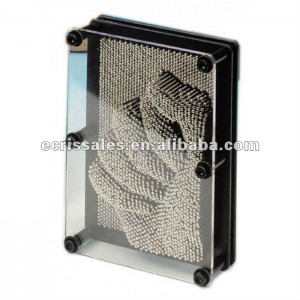
Lower the double-packed coffee stirrers box straight down onto the item to be negatively duplicated. This should look like one of those nail head toys.

448023138_854

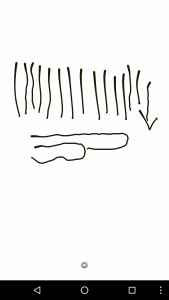
Make sure that your stirrers are not bending around the item you are duplicating.

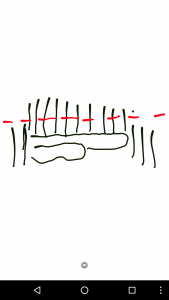
Screenshot_20160328-072545

Screenshot_20160328-072704

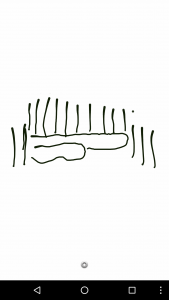
Once you have the mold, you will use the dremel to cut the stirrers flat across the top of the box while the item is still under the stirrers.

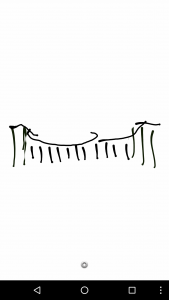
Screenshot_20160328-072801

Remove the item from underneath the stirrers.

Screenshot_20160328-072906

Press all the stirrers down to touch the flat surface and you now have your negative/inverse/opposite/mirror image mold.

Screenshot_20160328-072945

You can then use plaster of Paris or other mold-making stuff to push into the top part of the stirrers and wait for it to dry to have your NIOM mold. From there, your mold release agent should be used as in normal mold-making.

Screenshot_20160328-073037

As mentioned before, this will be a very rough NIOM mold and will probably need some detailing, but at least the dimensions will already be there.

The automatic version of this NIOM device I came up with (involving no cutting) may come to fruition if I get some funding or if a company wants to buy the idea.

Hope this helps!

I will try to add more pics soon.

SOLVED WordPress wp-admin redirect loop can’t log in lost css

The last two updates of WordPress (4+) have produced a redirect loop when attempting to log into the wp-admin page. I went through numerous solutions found online and the one that worked for me was to change the permissions on the wp-login.php file (in the root directory) to 644. It seems that when doing the update, WordPress changes the permission on this file. Once I changed it to 644 in my FTP client (filezilla), it instantly worked! So, this latest update (4.4.2) created the same issue and I had it back up and running in 10 seconds!

UPDATE: Upgrading to WP 4.5 produced an error on the front end and it ended up being the same issue. The admin section lost all of its CSS and I couldn’t get to any page I tried to click on.

Change all the permissions of the FILES under the wp-admin folder to 644. WP changed them to 777. Change your index.php file under the root directory to 644 as well.

Filed under Web

Xack’s Frozorganizers! Color-coded freezer bags!

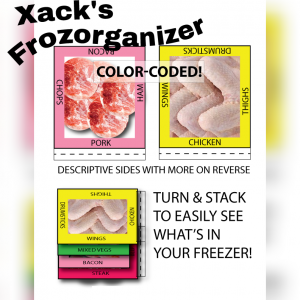
So, the latest idea I am putting “out there” is my Frozorganizer Freezer Bag System (On Indiegogo). It consists of several different colors of gallon freezer bags that are also labeled. Red for beef, green for vegetables, etc.

Xack's Frozorganizer Freezer Bag System

Xack’s Frozorganizer Freezer Bag System

Here’s the idea:

Heavy duty freezer bags that are color coded and pre-labeled with the type of items. When placing in the freezer, you turn the side of the bag that describes what’s in it towards you, so you could, at a glance, see what items are in your freezer.
Bags are:
Pink for pork, and labeled on the four sides “pork”, “bacon”, “ham” and “chops”. Flip the bag over and the four sides are labeled “shoulder”, “rump”, “ground” and “special”. If the item in the bag does not fit the category, you choose the main “pork” side.
Red bags for beef, similarly labeled with “beef”, “ground”, “steak”, etc.
Yellow for chicken, green for vegetables, white for potatoes and rainbow for desserts.
These freezer bags are dishwasher safe, reusable and also have a flap that can be turned up to show that the contents are fully cooked.

How I got the idea:

Christmas morning, I went to the freezer to pull out something from the day before and noticed what a jumbled mess everything was in there. I started examining the contents and could not determine what some of the items were. That’s when it hit me. I needed color-coded bags to organize my freezer! Not only color-coded, but also able to turn them on the shelf to easily show what cut of meat or type of vegetable!
Xack’s Freezer Bag System allows you quick visual access to what’s lurking in your freezer. Since the bags are reusable and dishwasher safe, they will pay for themselves!
I envision this to be something that everyone will need and everyone will gift to others.

Check it out on Indiegogo!